
Beginner Sourdough Bread Recipe
Introduction
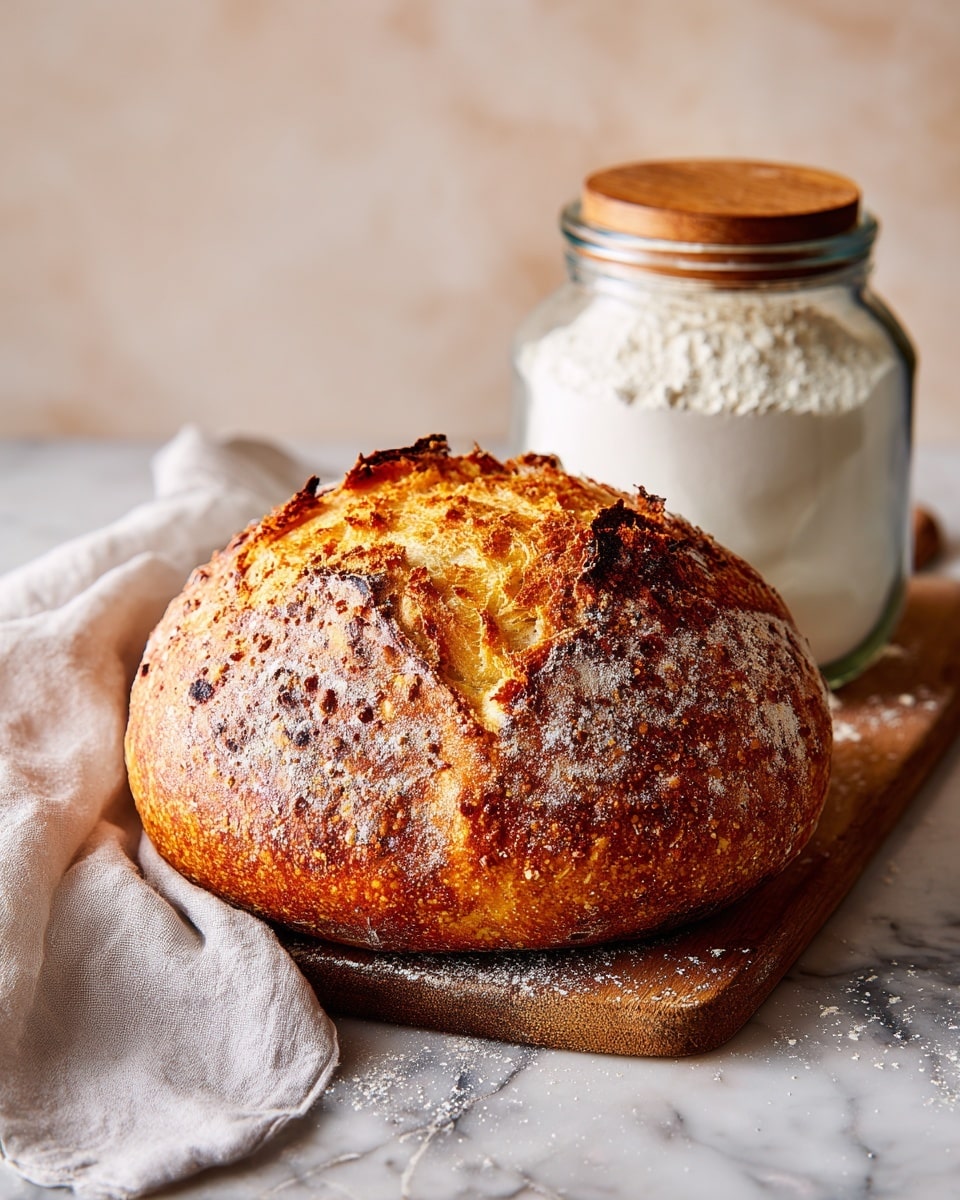
This beginner sourdough bread recipe guides you through the rewarding process of baking your own crusty, flavorful loaf. With just a few simple ingredients and some patience, you’ll create a beautiful sourdough perfect for sandwiches or enjoying with butter.
Ingredients
- 2 teaspoons sourdough starter
- 3 tablespoons all-purpose flour
- 5 teaspoons water
- 1/4 cup active sourdough starter (100% hydration)
- 1 1/3 cups + 2 tablespoons water
- 2 teaspoons fine sea salt
- 4 cups + 2 tablespoons bread flour
Instructions
- Step 1: Feed your sourdough starter. About 12 hours before mixing the dough, combine 2 teaspoons sourdough starter, 3 tablespoons all-purpose flour, and 5 teaspoons water in a clean jar. Stir until combined, loosely cover, and leave at room temperature. It’s ready when it doubles in size and bubbles appear on the surface and sides.
- Step 2: Make the dough. In a large bowl, mix 1/4 cup active starter with 1 1/3 cups + 2 tablespoons water until evenly distributed. Add 4 cups + 2 tablespoons bread flour and 2 teaspoons sea salt. Use a spatula or hands to combine until no dry flour remains, forming a shaggy dough. Cover and rest for 1 hour.
- Step 3: Stretch and fold. Wet your hand slightly to prevent sticking. Stretch the dough from one side and fold it over itself. Turn the bowl a quarter and repeat until you complete a full circle. The dough should become a tight ball. Cover and rest 30 minutes, then repeat this stretch and fold once more.
- Step 4: Bulk ferment. Cover the dough and let it rise at room temperature for 7 to 10 hours. The dough should rise about 50-75%, not double. If it doubles or feels difficult to shape, it may be over-proofed.
- Step 5: Shape and second rise. Lightly flour a surface and turn out the dough. Pull each side into the middle, then flip it seam-side down. Cup and twist the dough to create a tight skin. Place dough on parchment paper, then lift and transfer to a bowl. Cover with a tea towel and rest 1-2 hours. Test readiness by pressing your thumb about ½ inch deep; if the dough springs back quickly, it needs more time.
- Step 6: Score and bake. Preheat oven to 450°F (232°C) with a Dutch oven inside. Carefully remove the hot Dutch oven, take off the lid, and score the dough’s surface with a sharp knife. Use the parchment to lift and place the dough inside the Dutch oven. Cover and bake for 20 minutes, then remove the lid and bake 25-30 more minutes until golden brown. The internal temperature should read 205-210°F (96-99°C).
- Step 7: Cool. Transfer bread to a cooling rack and let rest 1-2 hours before slicing to finish cooking and avoid a gummy texture.
Tips & Variations
- Use a digital thermometer to check doneness for perfect crust and crumb.
- For added flavor, include a tablespoon of olive oil or mix in seeds like sesame or flax.
- If you don’t have a Dutch oven, use a baking stone and a tray with water for steam.
- Adjust fermentation time depending on your room temperature; cooler rooms require longer rises.
Storage
Store your sourdough at room temperature wrapped in a kitchen towel, bread bag, or beeswax wrap. Avoid refrigeration as it dries out the bread. You can freeze whole loaves or slices tightly wrapped in plastic and stored in a freezer-safe container for up to three months. Reheat slices gently in a toaster or oven before serving.
How to Serve
Serve this delicious recipe with your favorite sides.
FAQs
How do I know when my sourdough starter is ready?
Your starter is ready when it has doubled in size and you see plenty of bubbles on the surface and sides of the jar. It should have a pleasant, slightly tangy aroma.
Can I use whole wheat flour instead of bread flour?
Yes, whole wheat flour can be used, but it may result in a denser loaf with a stronger flavor. You can substitute part of the bread flour with whole wheat flour to maintain some lightness.
Print
Beginner Sourdough Bread Recipe
- Total Time: Approximately 8 hours 10 minutes active time (excluding the starter feeding phase: about 21 hours total including fermentation and proofing phases)
- Yield: 1 loaf (about 1.5 pounds or 680 grams) 1x
- Diet: Vegetarian
Description
This beginner-friendly sourdough bread recipe guides you through the steps of feeding your starter, mixing, fermenting, shaping, and baking a rustic, flavorful loaf. Perfect for those new to sourdough baking, it uses simple ingredients and requires patience to develop the characteristic tangy crumb and crusty exterior of traditional sourdough bread.
Ingredients
Sourdough Starter
- 2 teaspoons sourdough starter
- 3 tablespoons all-purpose flour
- 5 teaspoons water
- 1/4 cup active sourdough starter (100% hydration)
Dough
- 1 1/3 cups + 2 tablespoons water (approximately 350 grams)
- 2 teaspoons fine sea salt (about 10 grams)
- 4 cups + 2 tablespoons bread flour (approximately 500 grams)
Instructions
- Feed your Sourdough Starter: About 12 hours before starting the dough, combine 2 tsp sourdough starter, 3 tbsp all-purpose flour, and 5 tsp water in a clean jar. Stir well, cover loosely, and let rise at room temperature until doubled in size and bubbly, creating about 1/4 cup active starter.
- Make the Dough: In a large mixing bowl, stir together 1/4 cup active starter and 1 1/3 cups plus 2 tbsp water until evenly combined. Add 4 cups plus 2 tbsp bread flour and 2 tsp sea salt. Mix with a stiff spatula or your hands until a shaggy dough forms and no dry flour remains. Cover and rest at room temperature for 1 hour.
- Stretch and Fold: Wet your hand to prevent sticking, then pick up one side of the dough, stretch it upward, and fold it over itself. Turn the bowl a quarter turn and repeat until you complete a full circle, forming a tight ball. Cover and let rest for 30 minutes. Repeat this stretch and fold process once more to help develop dough strength and volume.
- Bulk Fermentation: Cover the bowl and leave the dough to rise on your countertop for 7 to 10 hours. The dough should increase by about 50-75%, not fully double. Adjust rising time for future bakes if the dough doubles or becomes hard to shape, as it indicates over-proofing.
- Shape and Second Rise: Lightly flour a surface, turn the dough onto it, and shape into a round ball by folding edges into the center. Flip seam-side down and gently cup and pull the dough to tighten the surface. Transfer the dough using parchment paper into a medium bowl, cover with a tea towel, and let rest at room temperature for 1 to 2 hours. Check the readiness by making a half-inch indentation – if it springs back quickly, let it proof longer.
- Score and Bake: Preheat your oven to 450°F (232°C) with a Dutch oven inside for at least 30 minutes before baking. Carefully remove the hot Dutch oven, remove its lid, and score the top of the dough with a razor or sharp knife. Transfer the dough into the Dutch oven using the parchment paper sling, replace the lid, and bake for 20 minutes. Then, remove the lid and bake an additional 25-30 minutes until the crust is golden brown and internal temperature reaches 205-210°F (96-99°C).
- Cool: Remove the bread and place it on a cooling rack for 1 to 2 hours before slicing to allow the crumb to set and prevent gumminess.
- Store: Keep the cooled bread at room temperature wrapped in a bread bag, kitchen towel, or beeswax wrap. Avoid refrigeration. Freeze slices or whole loaves wrapped tightly for up to 3 months.
- Serve: Enjoy warm with butter or your favorite spreads like homemade Nutella or strawberry jam for a delightful taste experience.
Notes
- The sourdough starter must be active and bubbly for best results.
- Use bread flour for optimal gluten development and structure.
- Adjust fermentation times depending on room temperature and starter activity.
- A Dutch oven helps create steam, essential for a crusty loaf.
- Let bread cool fully before slicing to ensure proper crumb texture.
- Do not refrigerate the bread to avoid drying out the crust.
- You can freeze sourdough bread for longer storage, wrapping it tightly to prevent freezer burn.
- Prep Time: 12 hours (including starter feeding) + 1 hour dough rest + 1.5 hours stretch and folds + 7-10 hours bulk fermentation + 1-2 hours second rise
- Cook Time: 45-50 minutes
- Category: Bread
- Method: Baking
- Cuisine: French-style sourdough / Artisan bread
Keywords: sourdough bread, beginner sourdough, homemade bread, artisan bread, bread baking, fermented bread, dutch oven bread


