
Honey Walnut Sourdough Bread Recipe
Introduction
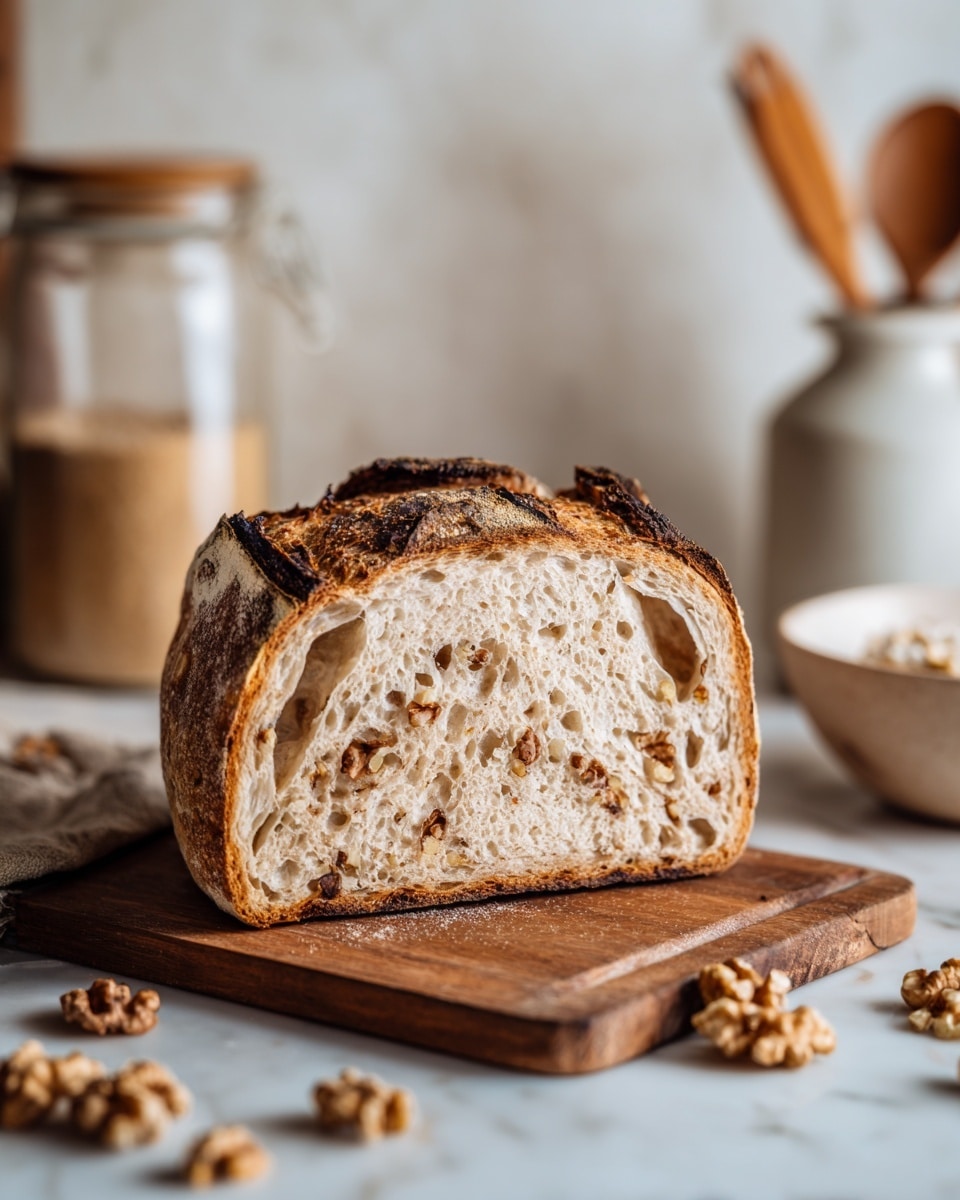
Honey Walnut Sourdough Bread is a delightful twist on classic sourdough, featuring the natural sweetness of honey and the crunch of toasted walnuts. This recipe creates a beautifully textured, flavorful loaf perfect for breakfast or snacking. With patience and care, you’ll achieve a crusty, aromatic bread at home.

Ingredients
- 100 grams sourdough starter (1/2 cup)
- 100 grams honey (scant 1/3 cup)
- 330 grams water (1 1/4 cups + 2 tablespoons), room temperature, filtered
- 500 grams bread flour (3 1/2 cups)
- 12 grams salt (2 teaspoons)
- 90 grams walnuts (3/4 cup)
- 4 grams cinnamon (2 teaspoons)
Instructions
- Step 1: In a large mixing bowl, combine the active sourdough starter, honey, and filtered room temperature water. Mix using a dough whisk or your hand until the mixture looks like a golden, milky liquid.
- Step 2: Add the bread flour and salt to the wet ingredients. Mix thoroughly until all the flour is incorporated. The dough will be wet and sticky rather than forming a solid ball.
- Step 3: Cover the bowl with plastic wrap or a reusable shower cap and let the dough rest for at least 30 minutes.
- Step 4: Perform a round of stretch and folds: with slightly wet fingers, take a section of dough, stretch it up, and fold it over the center. Rotate the bowl about 90 degrees and repeat until you complete a full circle (4 to 6 folds). The dough surface will become smoother.
- Step 5: Cover the dough again and rest for another 30 minutes.
- Step 6: Toast the walnuts in a small skillet over medium-low heat for about 5 minutes until fragrant, stirring frequently to avoid burning. Let them cool to room temperature, then roughly chop.
- Step 7: Sprinkle the chopped walnuts and cinnamon over the dough. Perform the second round of stretch and folds to incorporate them, then cover and rest for 30 minutes.
- Step 8: Repeat stretch and folds for a total of 4 rounds, resting 30 minutes between each. Cover the dough after each set.
- Step 9: After the final stretch and fold, cover the dough and let it bulk ferment on your counter for about 7 to 9 hours at 70°F (21°C), or until it has increased in size by about 75%, is domed, light, bubbly, and passes the windowpane test.
- Step 10: Gently release the dough from the bowl with wet fingers, preserving bubbles. Transfer it onto your work surface and shape it by doing another full round of stretch and folds.
- Step 11: Flip the dough seam side down and cover it with a bowl. Let it rest for 30 minutes.
- Step 12: Prepare your proofing basket by dusting it with flour (rice flour or all-purpose flour) to prevent sticking.
- Step 13: After resting, fold the dough into a tighter shape: pull the bottom, sides, and top of the dough towards the center. Flip seam side down and gently tighten the shape by cupping your hands around the dough and turning it clockwise, pulling gently toward you without tearing.
- Step 14: Place the shaped dough seam side up into the floured proofing basket and cover it with plastic wrap or a shower cap.
- Step 15: Cold-proof the dough in the refrigerator for 8 to 72 hours to develop flavor. Avoid leaving it too long to prevent over-fermentation.
- Step 16: Thirty minutes before baking, transfer the dough to the freezer to firm up for easier scoring. At the same time, preheat your oven to 500°F (260°C) with a Dutch oven inside for at least 30 minutes.
- Step 17: Place a piece of parchment paper on your workspace and invert the proofing basket so the dough falls onto the paper with the seamed side down.
- Step 18: Score the top of the dough with a crescent moon shape using a lame, razor blade, or sharp knife to allow expansion during baking.
- Step 19: Using the parchment paper corners, carefully place the dough into the preheated Dutch oven and cover with the lid.
- Step 20: Lower the oven temperature to 450°F (232°C). Bake covered for 30 minutes, then remove the lid and bake an additional 10 to 15 minutes at 425°F (218°C) until golden brown and the internal temperature reaches at least 205°F (96°C). If the crust browns too quickly, cover with foil.
- Step 21: Remove the Dutch oven from the oven and lift the bread out using the parchment paper onto a wire rack to cool.
- Step 22: Let the bread cool for at least 1 hour before slicing. This rest allows the crumb to fully set, preventing gumminess.
- Step 23: Slice, serve with butter and a drizzle of honey, and enjoy your homemade honey walnut sourdough bread.
Tips & Variations
- Use room temperature, filtered water to encourage proper fermentation and dough consistency.
- Toast the walnuts carefully on medium-low heat, stirring often to avoid burning and enhance their flavor.
- Add the walnuts and cinnamon during the second round of stretch and folds to evenly incorporate them without disrupting gluten development.
- Experiment with different nuts such as pecans or hazelnuts for variation.
- If you don’t have a banneton, use a small bowl lined with a well-floured tea towel to maintain the dough’s shape during proofing.
- For a sweeter twist, increase the honey slightly or add dried fruit like raisins or cranberries.
- Ensure your Dutch oven is fully preheated to create steam and achieve a crisp crust.
Storage
Store your honey walnut sourdough bread at room temperature wrapped in a clean kitchen towel or paper bag for up to 3 days to maintain crustiness. For longer storage, slice and freeze the bread in an airtight container for up to 3 months. To reheat, toast slices or warm the whole loaf in a 350°F (175°C) oven for 10 to 15 minutes.
How to Serve
Serve this delicious recipe with your favorite sides.
FAQs
Can I use regular yeast instead of sourdough starter?
This recipe is designed for sourdough starter, which provides unique flavor and texture through natural fermentation. Using regular yeast will change the dough’s characteristics and timing significantly. If you prefer using yeast, look for a specific yeast bread recipe for better results.
How do I know when the dough is properly fermented?
Look for these signs: the dough should increase in size by about 75%, have a domed top, jiggle slightly when the bowl is shaken, pull away easily from the bowl, display visible bubbles, and pass the windowpane test without tearing.
Print
Honey Walnut Sourdough Bread Recipe
- Total Time: 9 hours 40 minutes
- Yield: 1 loaf (approximately 1.5 to 2 lbs) 1x
Description
This Honey Walnut Sourdough Bread is a flavorful, homemade artisan loaf infused with toasted walnuts and warm cinnamon. Using a natural sourdough starter, honey for subtle sweetness, and a long fermentation process, this bread develops a beautifully complex flavor and a tender crumb. Perfect for breakfast or snacking, it pairs wonderfully with butter and a drizzle of honey.
Ingredients
Main Dough Ingredients
- 100 grams sourdough starter (1/2 cup, active)
- 100 grams honey (scant 1/3 cup)
- 330 grams water (1 1/4 cups + 2 tablespoons, filtered, room temperature)
- 500 grams bread flour (3 1/2 cups)
- 12 grams salt (2 teaspoons)
Mix-ins
- 90 grams walnuts (3/4 cup, toasted and roughly chopped)
- 4 grams cinnamon (2 teaspoons, ground)
Instructions
- Make the Dough: In a large mixing bowl, combine the active sourdough starter, honey, and room temperature filtered water. Mix well with a dough whisk or your hand until the mixture resembles a golden, milky liquid. Add the bread flour and salt to the wet ingredients and mix until fully incorporated, resulting in a wet and sticky dough rather than a firm ball. Cover with plastic wrap or a reusable shower cap and let rest for at least 30 minutes.
- First Round of Stretch and Folds: Using slightly wet fingers, pull a section of the dough from the bowl and stretch it up then fold it over the dough. Rotate the bowl a quarter turn and repeat the stretch and fold until you have completed a full circle (4-6 times). Cover and rest the dough for another 30 minutes.
- Prepare Walnuts and Add Mix-ins: Heat a small skillet over medium-low heat and toast the walnuts for about 5 minutes, stirring often until fragrant. Remove and let cool to room temperature, then roughly chop. Sprinkle the walnuts and ground cinnamon over the dough and perform a second round of stretch and folds incorporating the mix-ins. Cover and rest for 30 minutes.
- Repeat Stretch and Folds: Perform a total of 4 rounds of stretch and folds with at least 30 minutes of rest in between each. Cover the dough after each round.
- Bulk Fermentation: After the final stretch and fold, cover the dough and allow it to ferment at around 70°F for 7-9 hours or until it has increased in size by at least 75%, is domed on top, jiggles when the bowl is shaken, pulls away easily from the bowl, has visible bubbles, and passes the windowpane test without tearing.
- Pre-shape: Using slightly wet fingers, gently release the dough from the bowl without deflating the bubbles. Let it fall onto the counter, then perform another round of stretch and folds around the dough to pre-shape. Flip it seam side down on the counter and cover with a bowl. Let rest for 30 minutes.
- Prepare Proofing Basket: Dust a banneton or lined small mixing bowl with flour (rice or all-purpose) to prevent sticking and keep the shape during proofing.
- Final Shape: Flip the dough seam side up. Gently fold the bottom, right, left, and top edges towards the center. Flip the dough seam side down and tighten the shape by rotating and gently pulling the dough towards you in a quarter turn until tight but not torn. Place dough seam side up in the floured proofing basket and cover with plastic wrap or shower cap.
- Cold Proof: Refrigerate the dough in the basket for 8 to 72 hours to slow fermentation and deepen flavor. Do not overproof to avoid poor oven rise.
- Score Preparation: Thirty minutes before baking, place the dough into the freezer to firm it for scoring. Meanwhile, preheat the oven to 500°F with a Dutch oven inside for at least 30 minutes.
- Score and Bake: Transfer the dough gently from the proofing basket onto parchment paper with the oat side facing up. Score a crescent moon shape on top with a lame or sharp knife to allow expansion during baking. Using the parchment paper, place the dough into the preheated Dutch oven and cover with its lid.
- Bake Covered and Uncovered: Reduce oven temperature to 450°F and bake the bread covered for 30 minutes. Remove the lid and bake for an additional 10-15 minutes at 425°F uncovered until the crust is golden brown and the internal temperature reaches at least 205°F. Cover with foil if the crust browns too quickly.
- Cool: Remove the bread using the parchment paper and place it on a wire rack to cool for at least 1 hour before slicing to prevent a gummy texture.
- Serve: Slice and enjoy your honey walnut sourdough bread with butter and a drizzle of honey.
Notes
- Temperature affects fermentation time: warmer environments ferment faster, cooler environments slower.
- Walnuts burn easily, toast carefully on medium-low heat while stirring frequently.
- Use wet fingers for handling dough to prevent sticking and tearing.
- Cold proofing can be from 8 to 72 hours but avoid over-proofing to ensure good oven spring.
- Allow bread to cool completely before slicing to maintain crumb texture.
- Adding mix-ins during the 2nd round of stretch and folds helps incorporate them evenly without tearing the dough.
- Use parchment paper to easily transfer dough in and out of the Dutch oven.
- Prep Time: 1 hour
- Cook Time: 45 minutes
- Category: Bread
- Method: Baking
- Cuisine: American Artisan
Keywords: sourdough bread, honey walnut bread, artisan bread, homemade bread, sourdough recipe, toasted walnuts, cinnamon bread


